
 Thanks for tuning in to my first knit along! I hope you are as obsessed with the knit bonnet trend as I am. Now if only I had a baby to go along with it. I borrowed a friend’s baby. Isn’t she the cutest?
 There are lots of dot knit designs out there, or “bobbles” as the knitting world calls them. However, I always felt like they were just too big for a baby bonnet. I wanted something a little daintier for those cute baby faces, so the mini-dot was born. I think it makes the perfect texture. Now may also be a good time to mention this is a beginner-friendly pattern. Yay! Let’s get started.
We will be making the newborn sized bonnet.
Download the pattern HERE.
 You will need:
- worsted weight yarn
- size 4mm (US 6) circular knitting needles (you can use similar sized needles with not much difference in size, but I like 6) and one extra similar sized needle.
- Tapestry Needle for weaving in ends
- Scissors
For the body of the bonnet we will start by casting on 50 then begin the ribbing. Repeat knitting 2 and purling 2 for 4 rows. It will look like this.

Continue with 4 rows of stockinette stitch.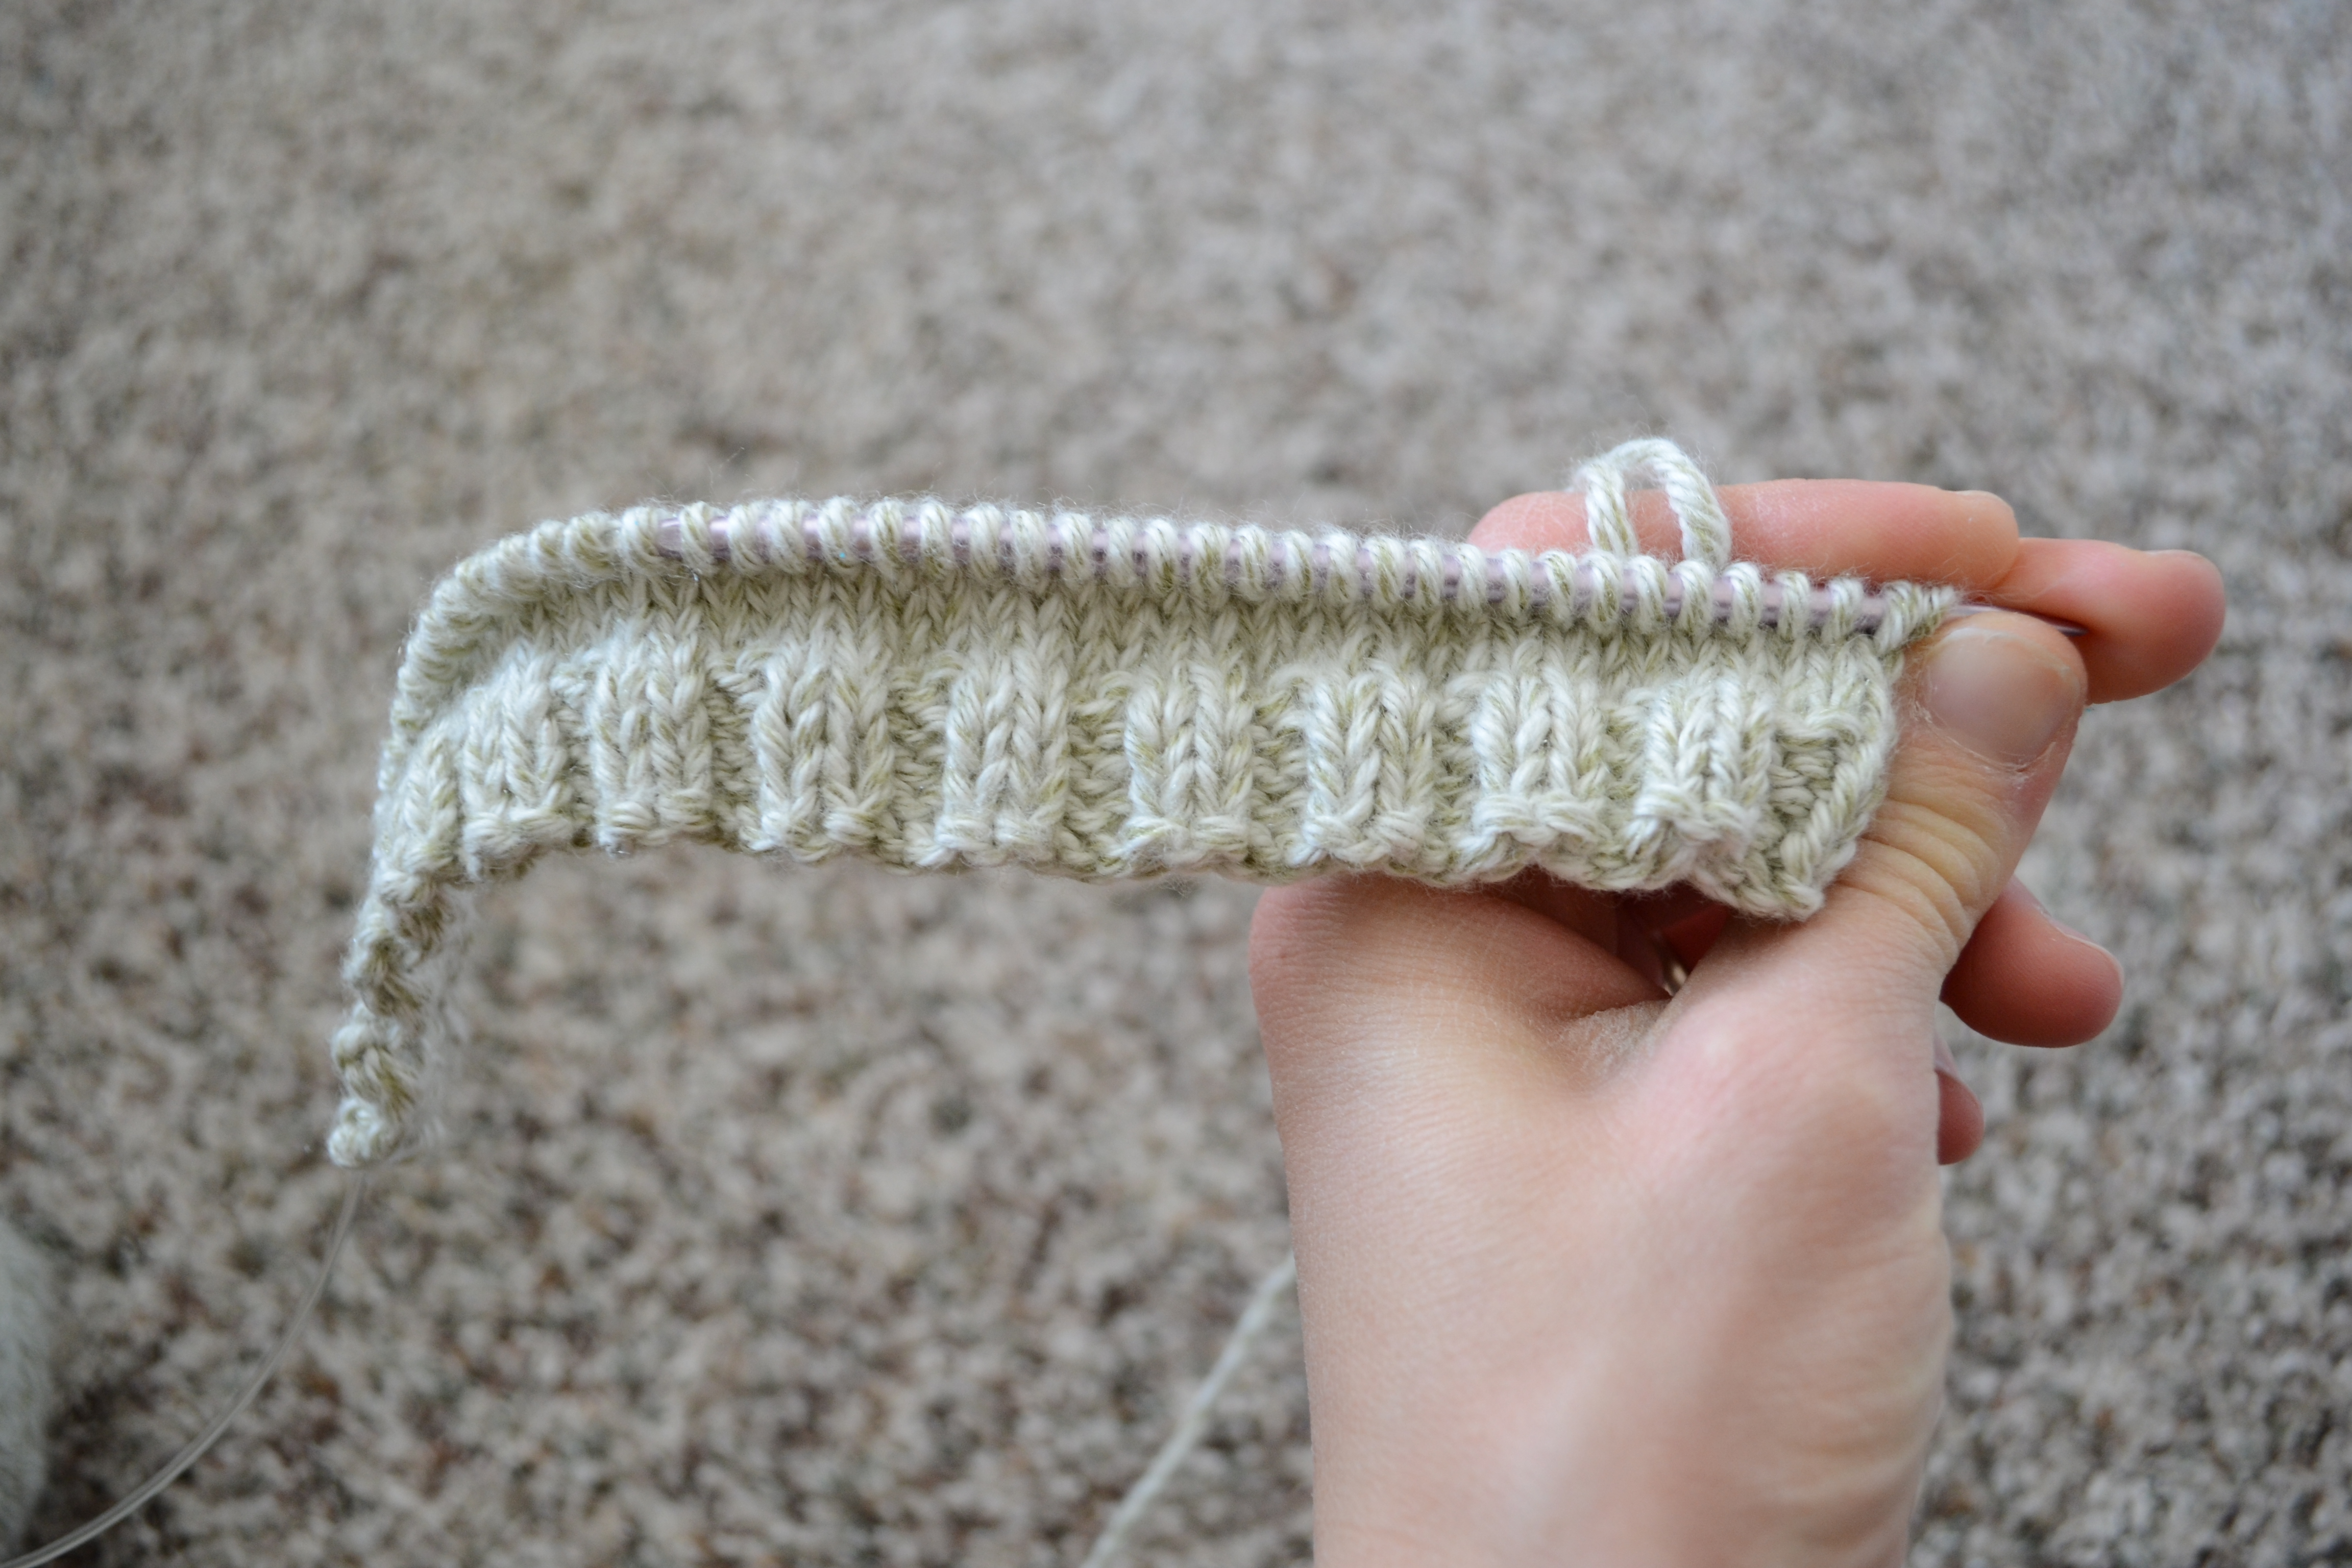
We’re now beginning row 9, with 4 rows of ribbing and 4 rows of stockinette done. Looking good. Knit 4 stitches then in stitch 5 we will start our mini bobble.


In the same stitch knit 1, purl 1, knit 1, purl 1, then knit 1 in the back of the stitch. You should now have 5 new stitches on your needle in the same stitch. Slide this off and begin your decrease (Pull 4 stitches back over the last stitch). You should end up with a bobble and one new stitch on your needle. You did it! If we were sitting down together I’d pass you a celebratory chocolate chip cookie.
Continue knitting and bobbling. . . until you have this.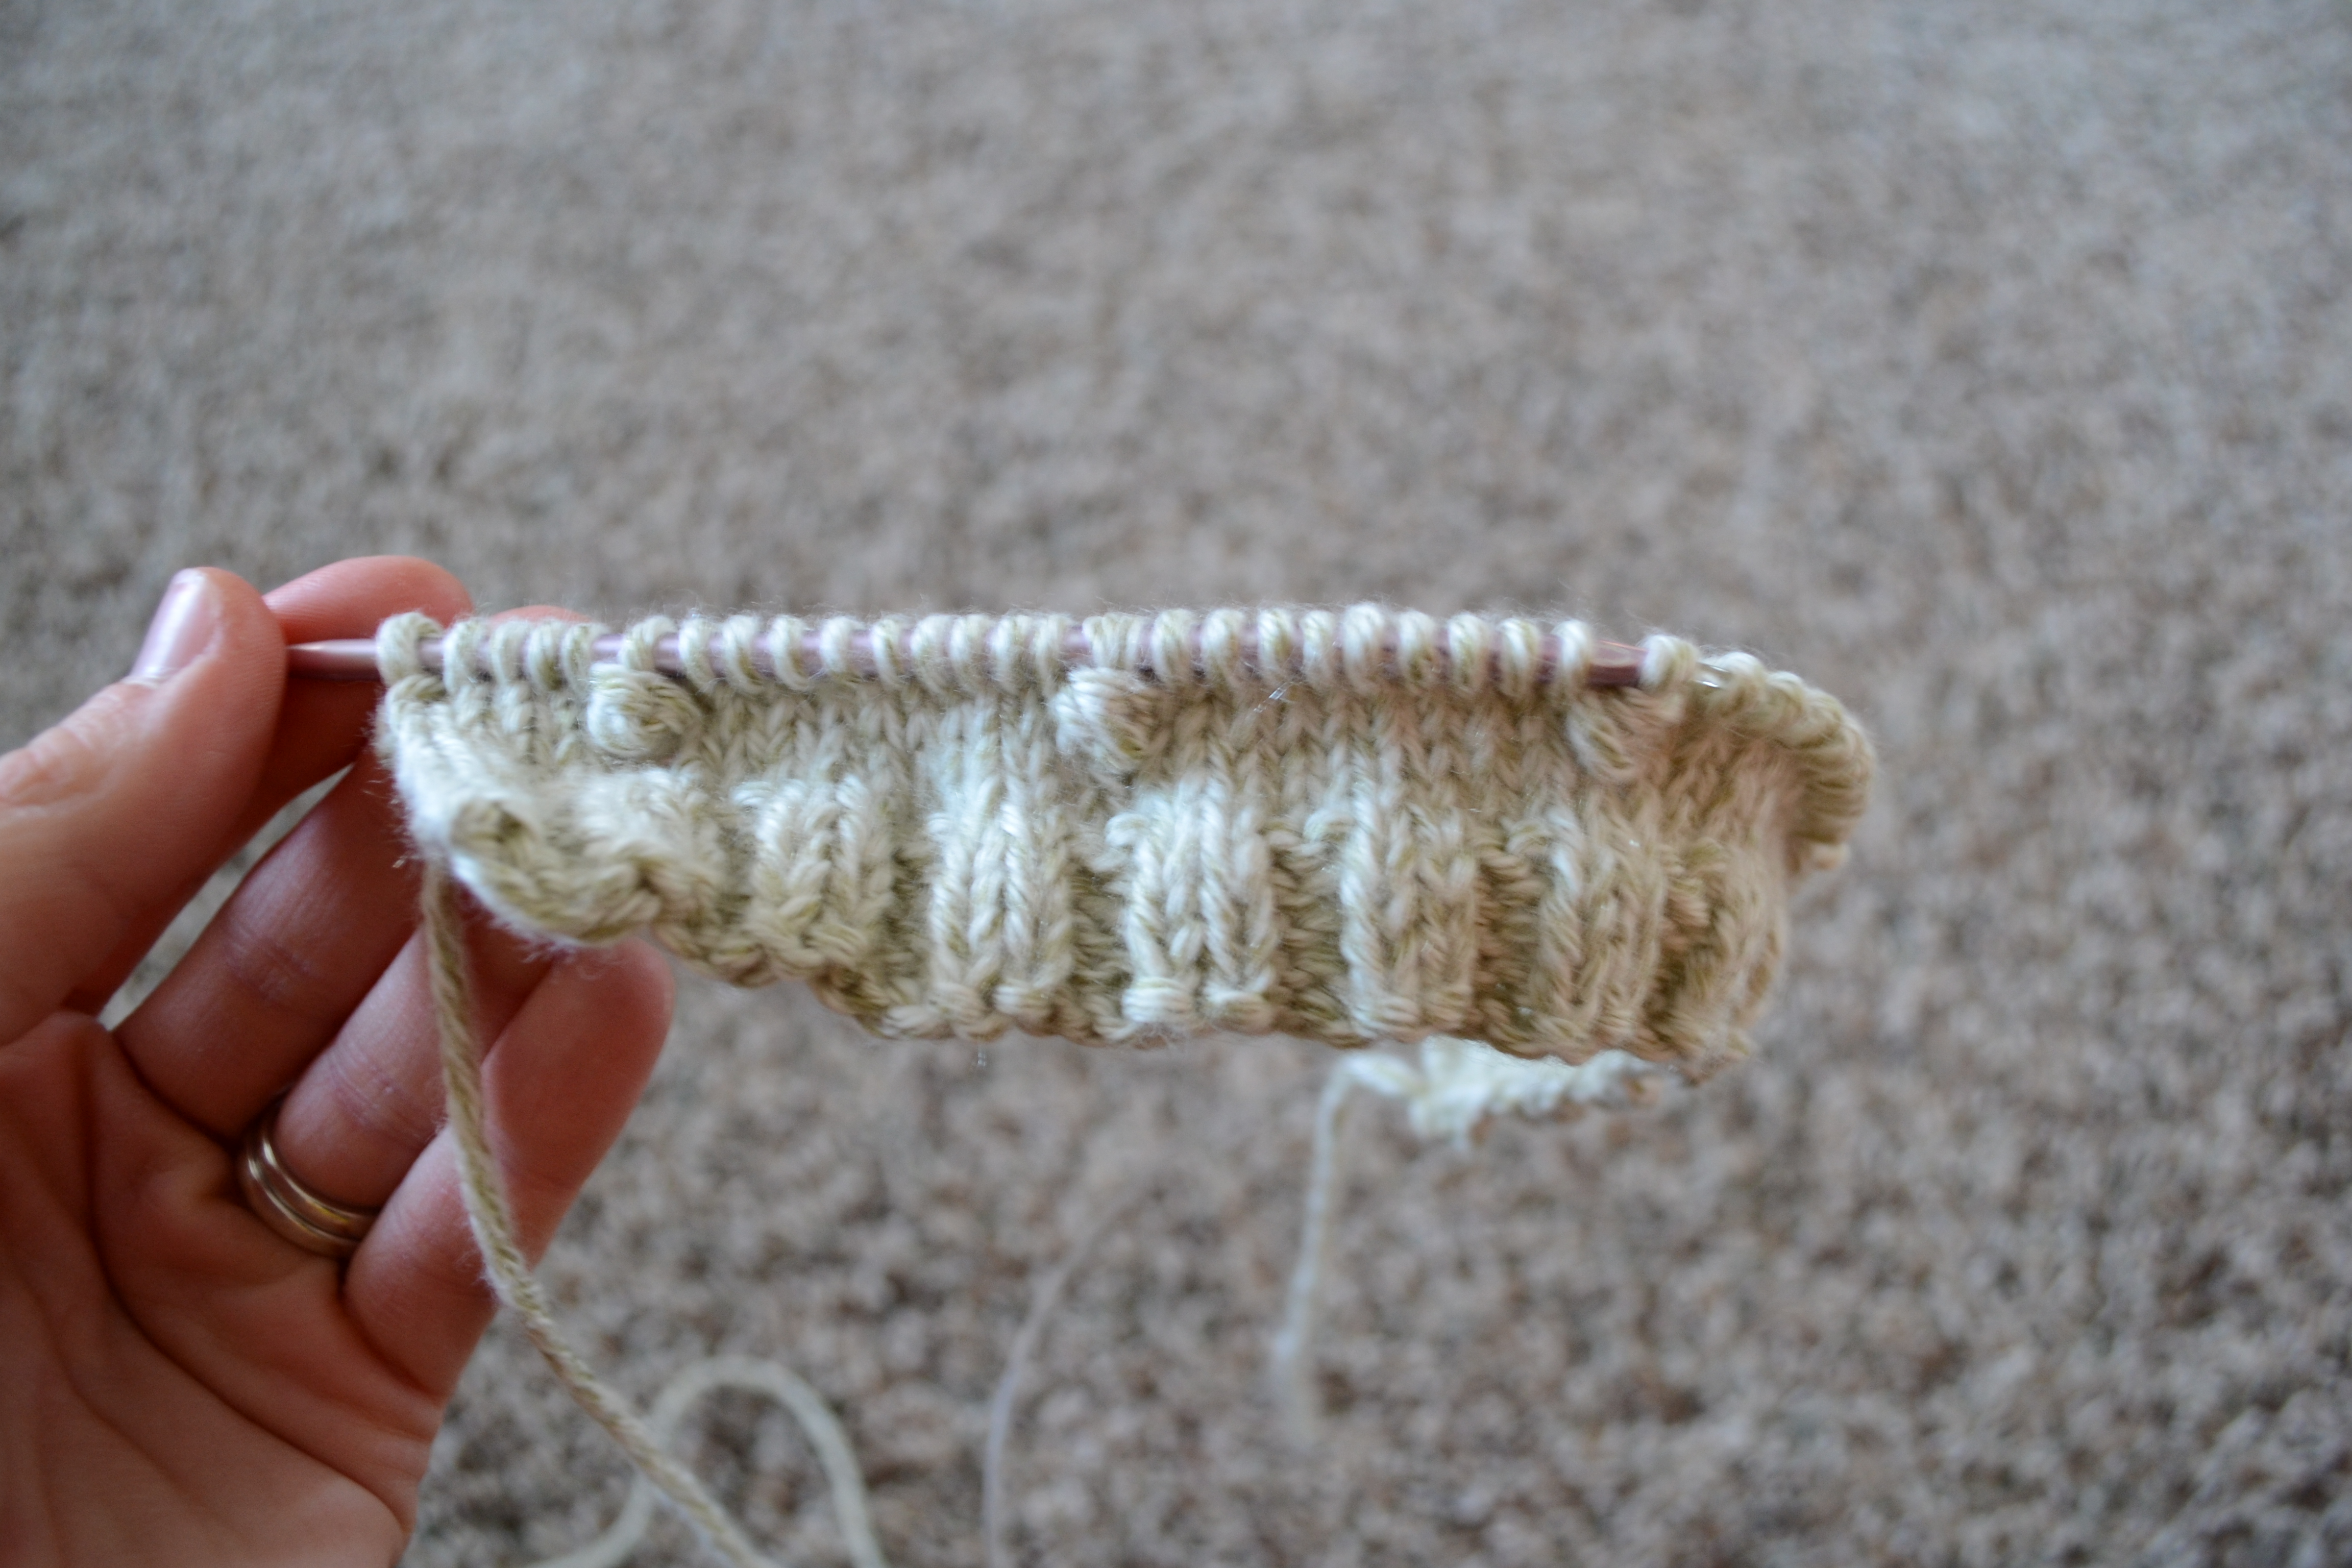 Look at that beautiful row of bobbles.
Back to our stockinette stitch and more bobble rows. When you finish all the rows you should have 2.5 sets of bobbles rows (by set I mean two rows) or 5 bobble rows total on your bonnet. Do you have that? Plus the last extra 2 of stockinette? Good. Let’s seam it up.
Using that handy dandy circular needle pull up on the cord so there’s 25 stitches on each needle. Put them right side together to start your three-needle bind off.


If you’ve never done that here’s what it looks like.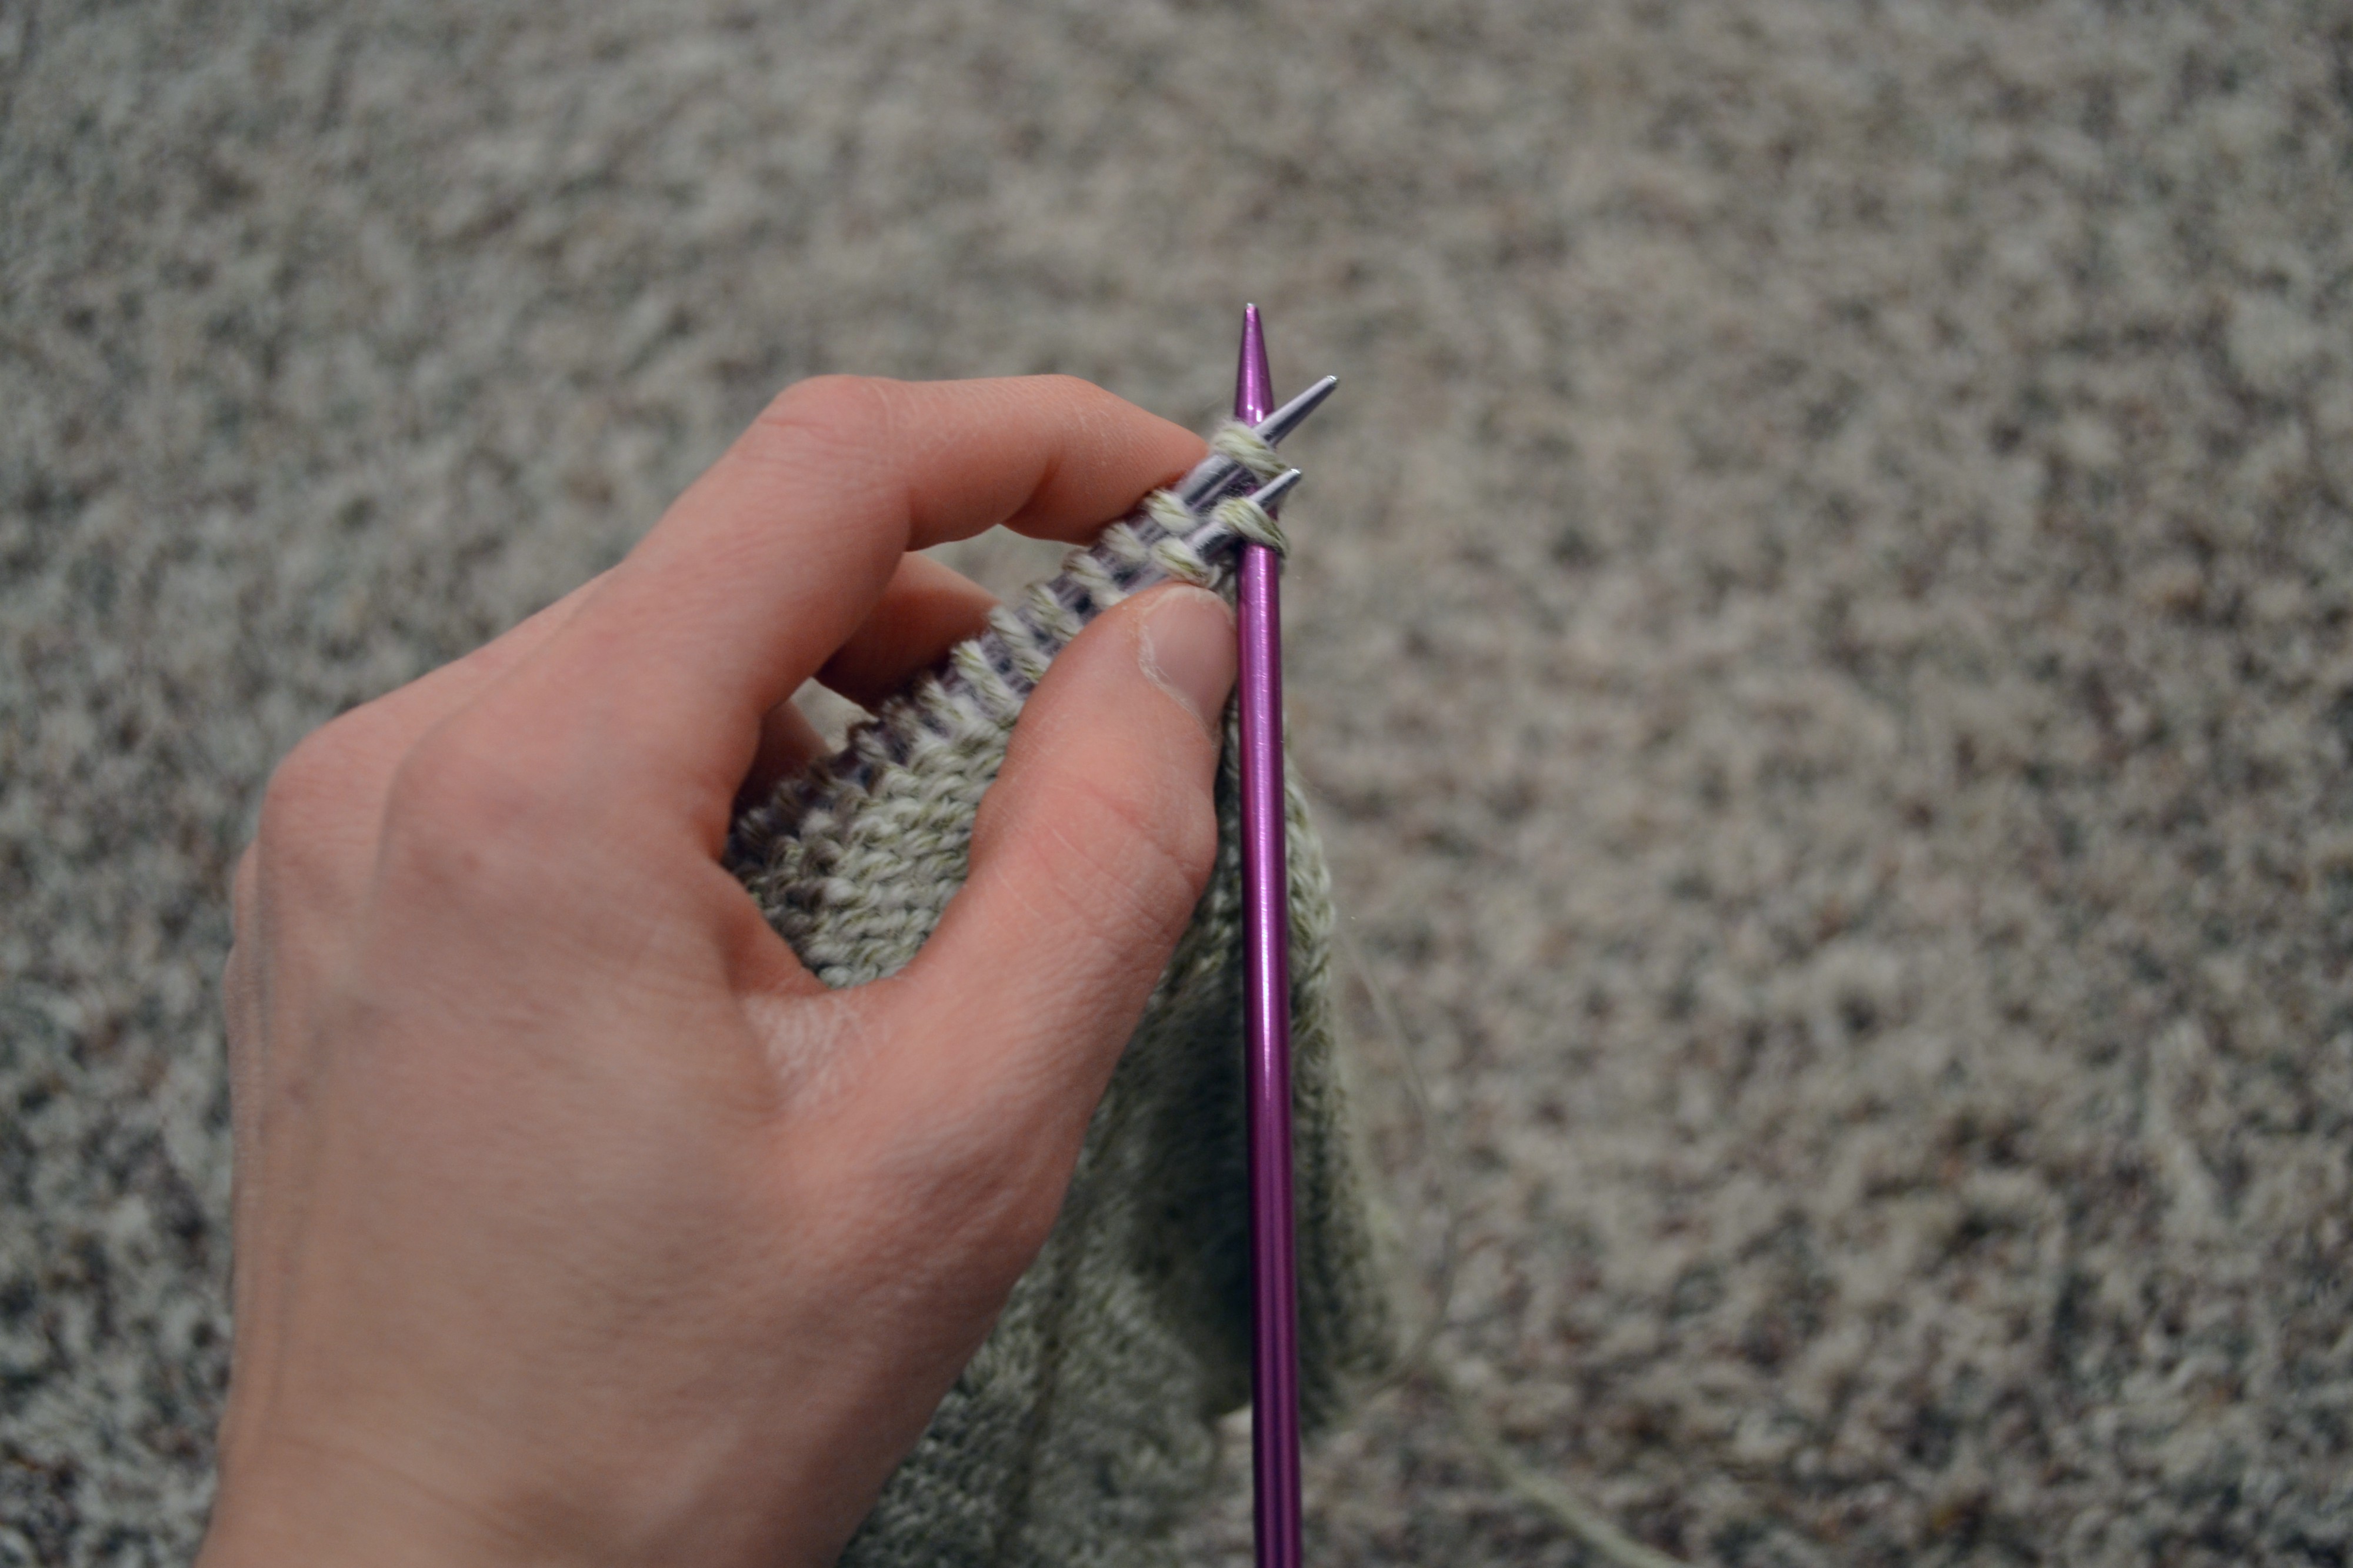 Knit like normal into the first stitches using your third needle. Once you have knit 2 stitches on your extra needle, pull the first stitch over your last like you would a normal cast off. As long you don’t have more than 2 stitches on your working needle you’re doing it right. If you need more help, youtube has a plethora of three-needle bind off videos. Keep going until it’s all bound off and cut your yarn.
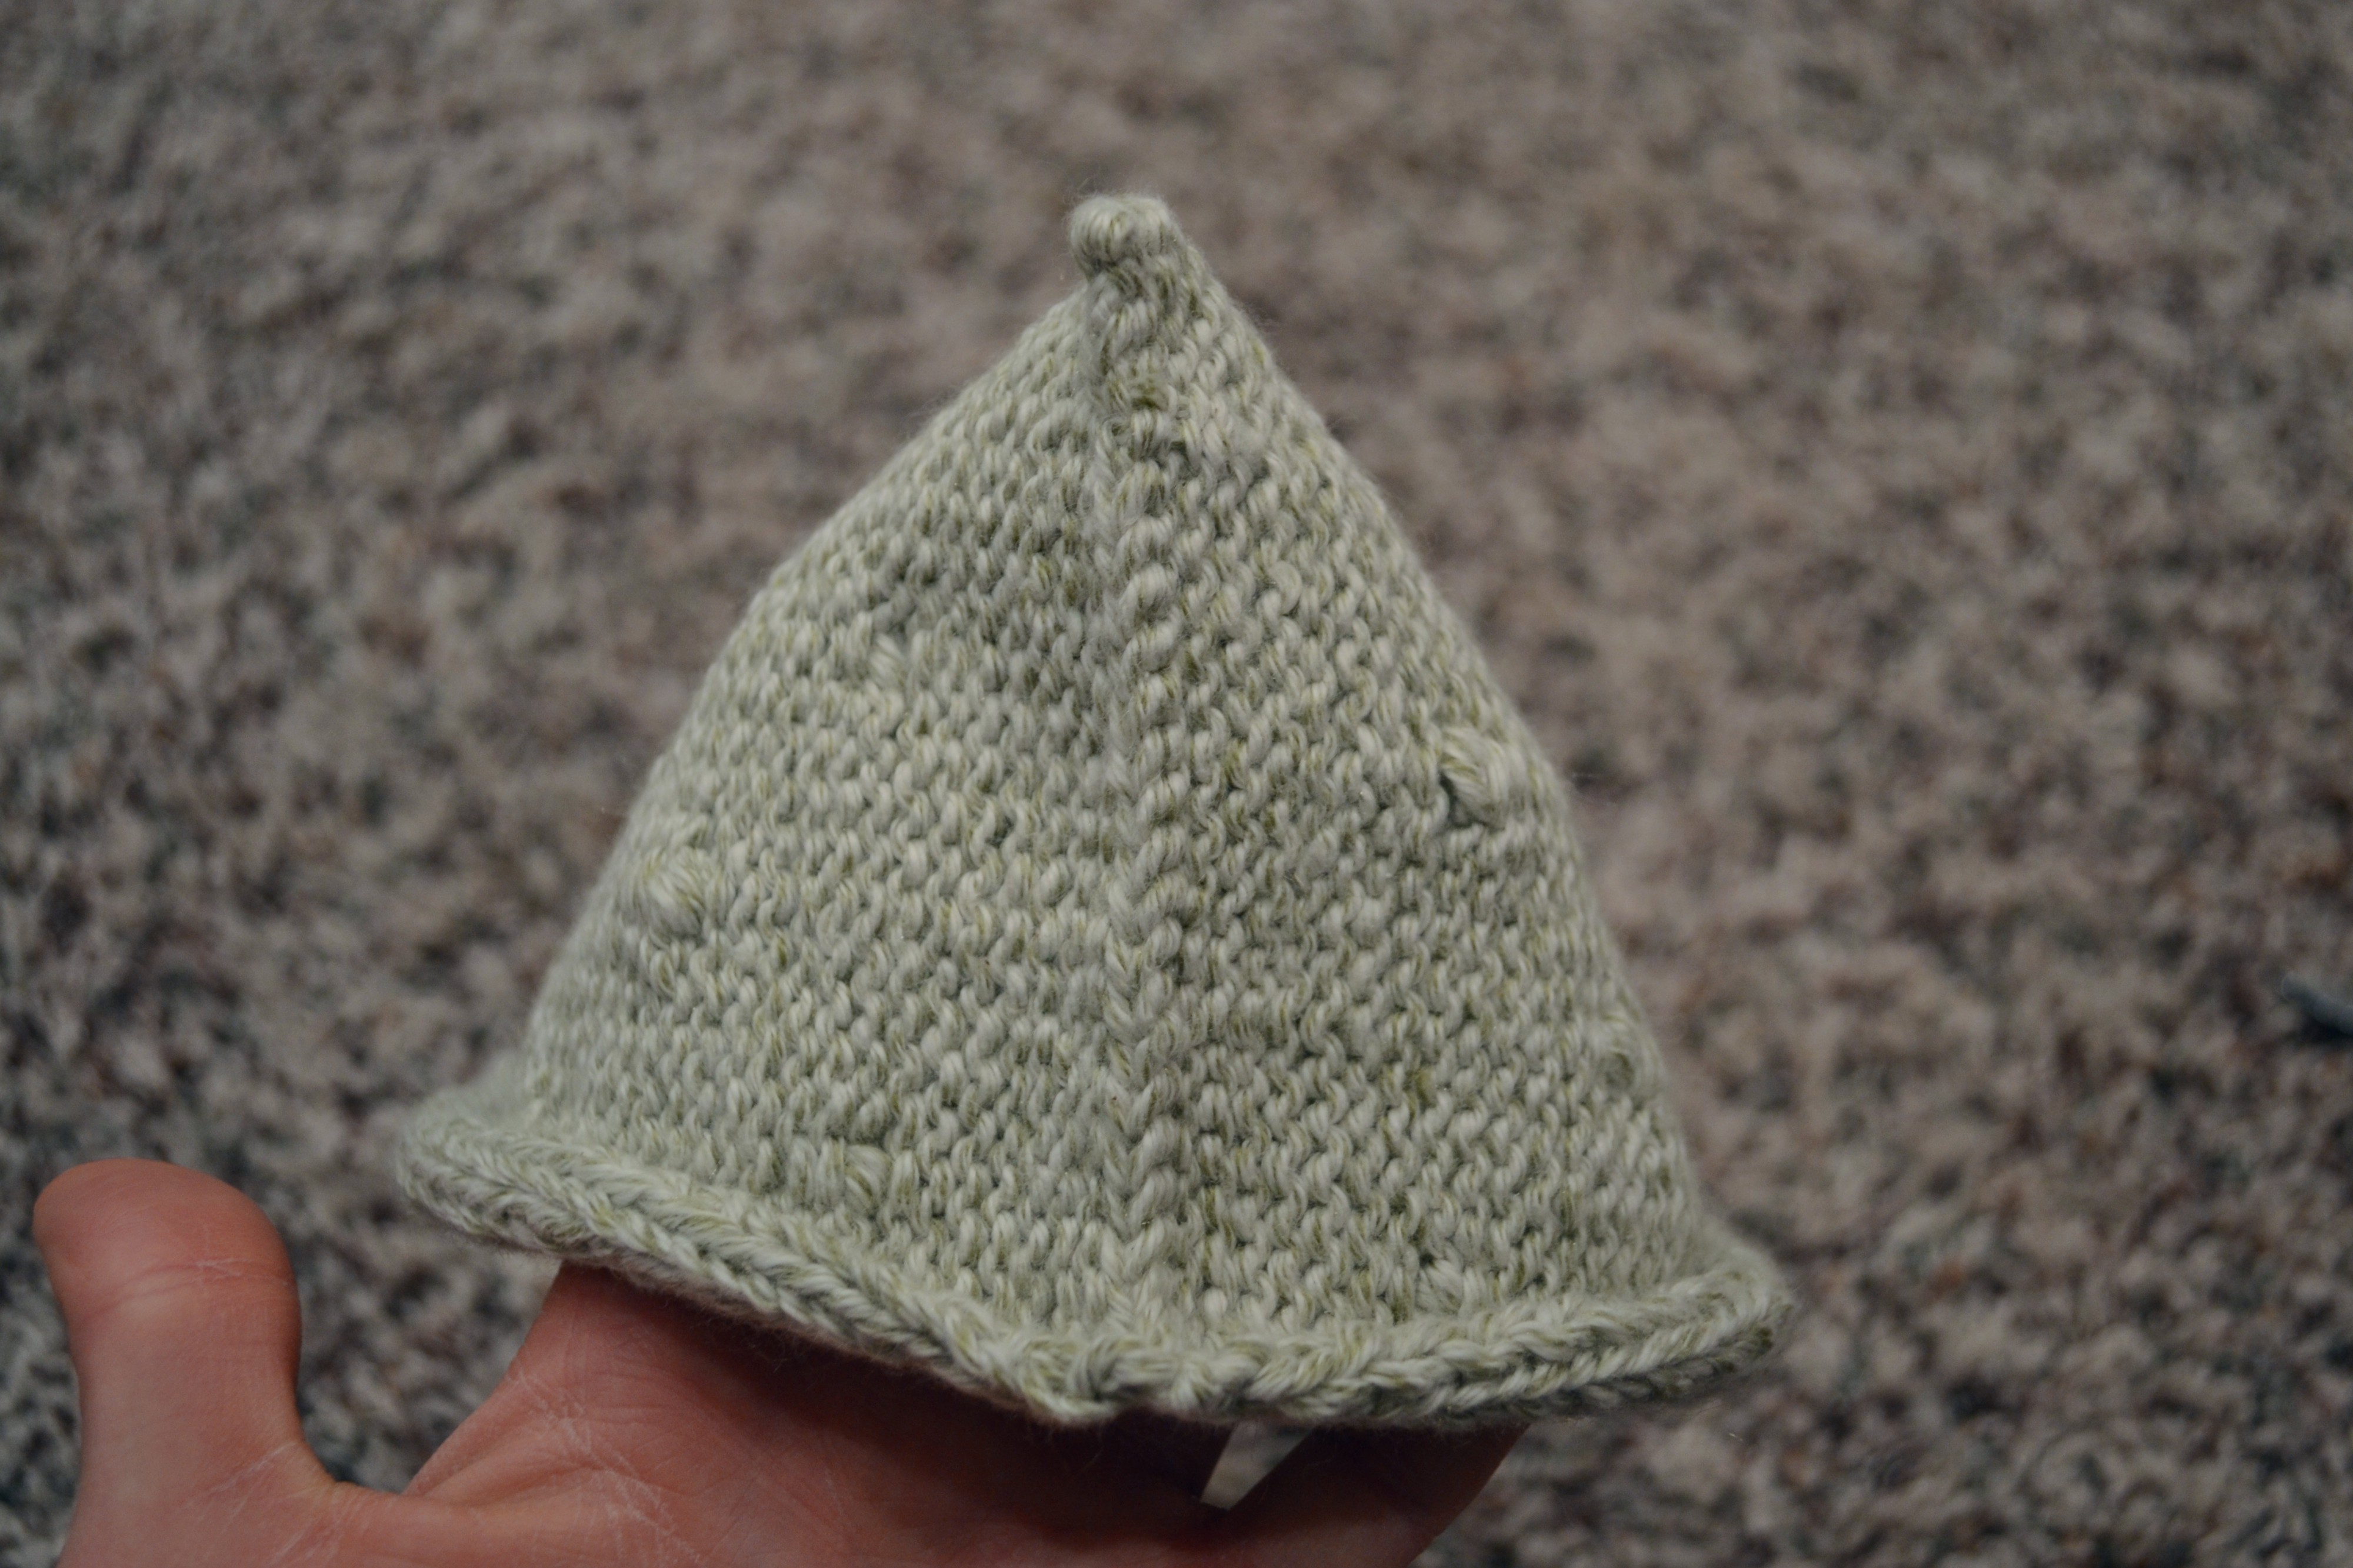 The end is in sight!
For the bottom ribbing, turn the bonnet upside down with the right side facing you. Now dig into the corner and pick up a stitch. I always go under both threads some people do one but two feels more secure to me.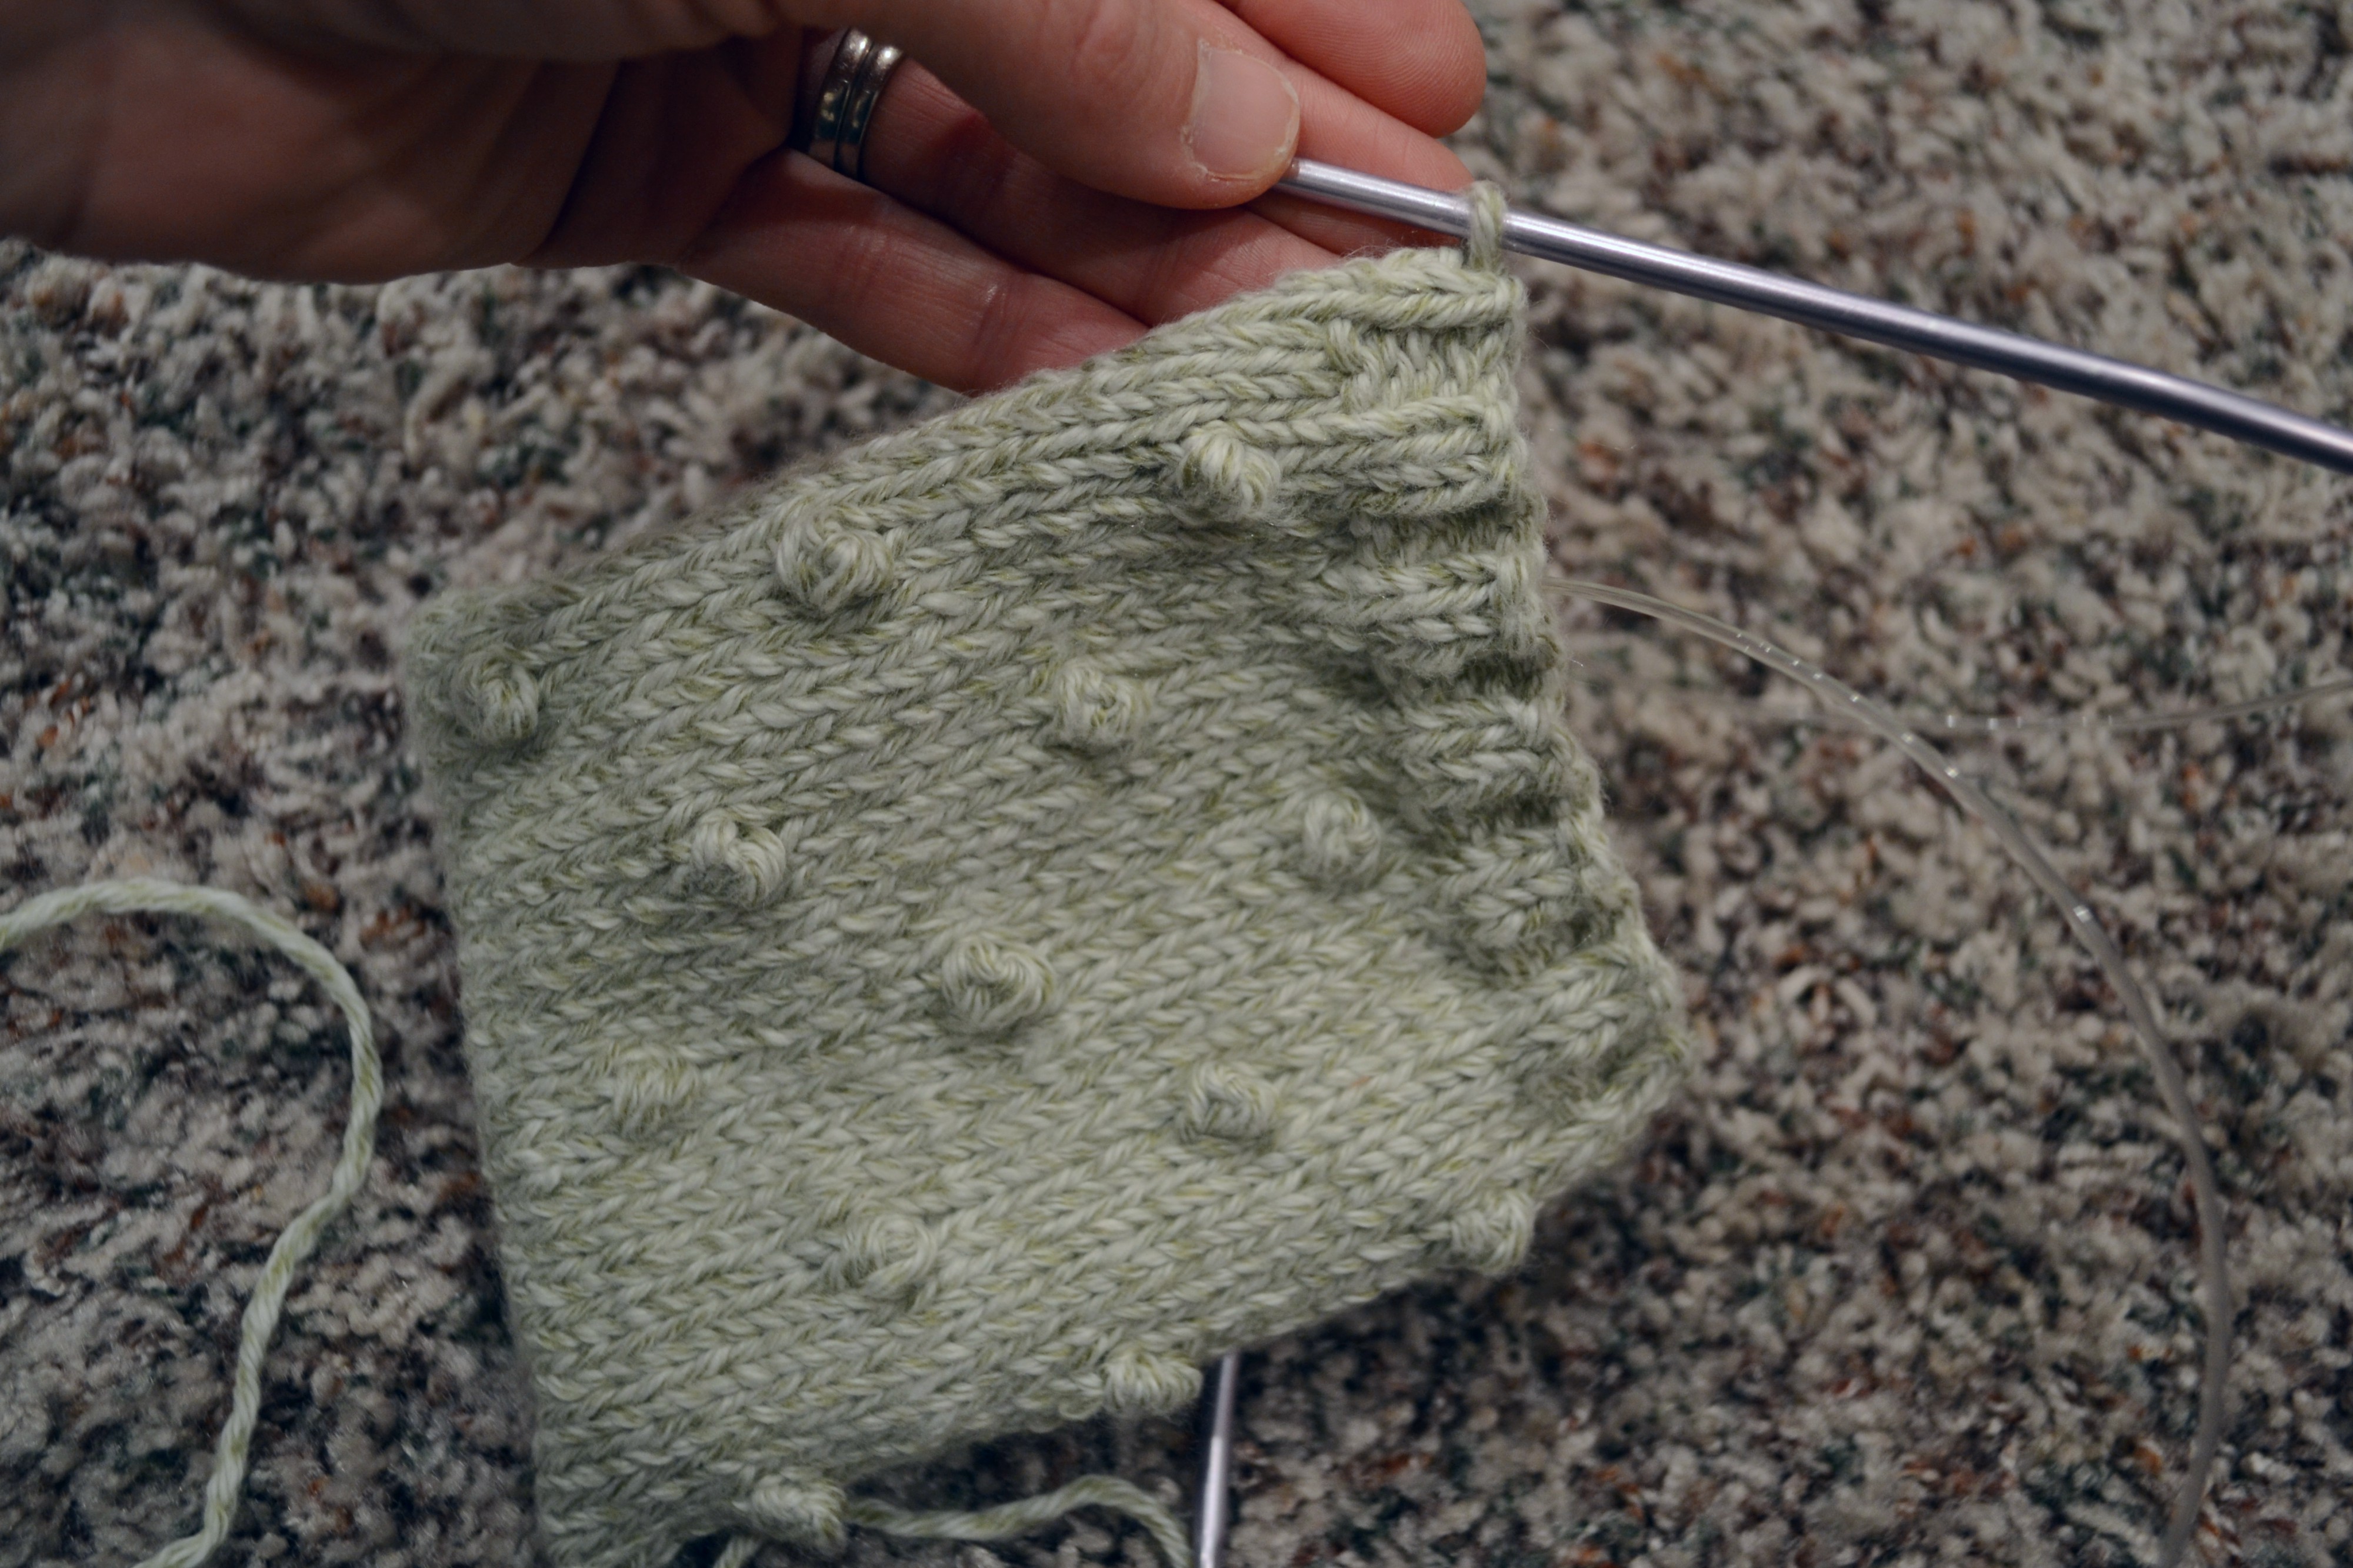 Now watch your work closely and pick up a stitch EVERY OTHER row. So You’ll end up skipping half of those little holes basically. Check out the picture below- I’ve stuck my needle in the holes so you can see them better. I sometimes do this if the yarn is making it hard to find, which happens. The loop is my corner stitch that I picked up and then I will go every other hole to pick up a new one. This makes the neck fit right. Not too tight not too loose.
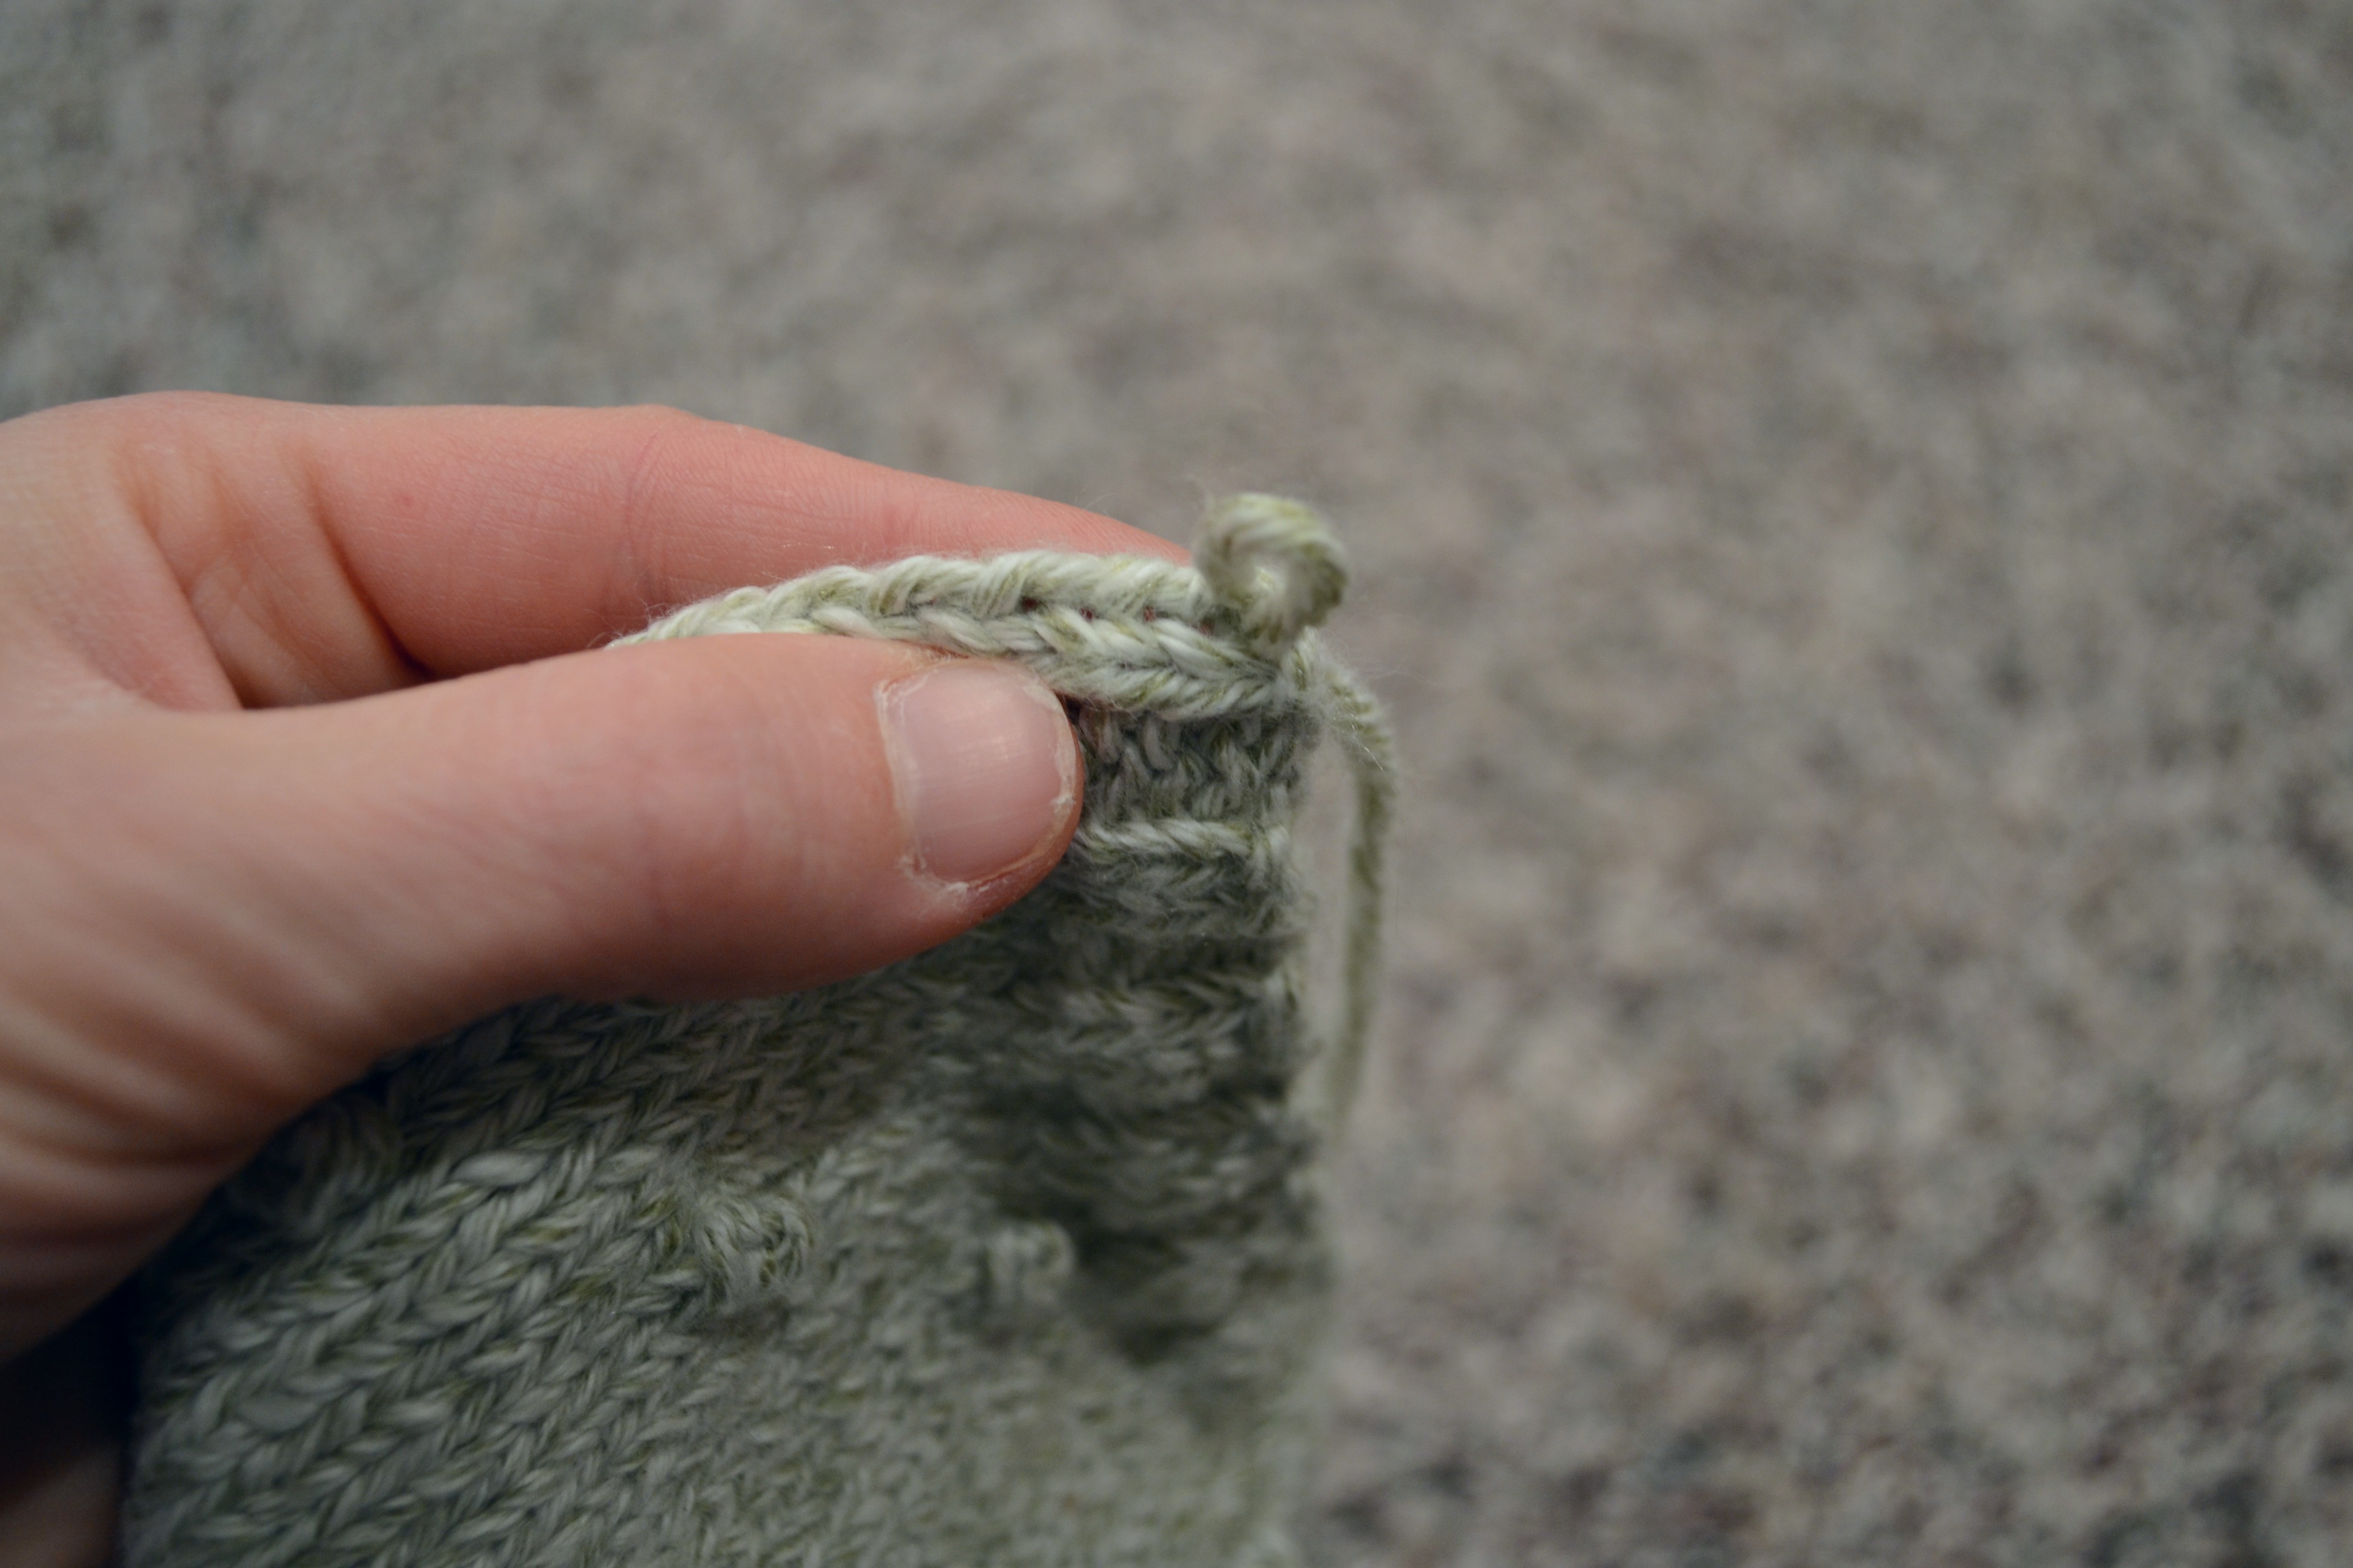
After you’ve picked up all your stitches we will repeat K2, P2 for 4 rows. When you go to bind off after the 4th row make sure to keep knitting and purling in sequence, if you don’t your edge will be really straight, and it just doesn’t flow as well with the ribbing. Trust me on this one!
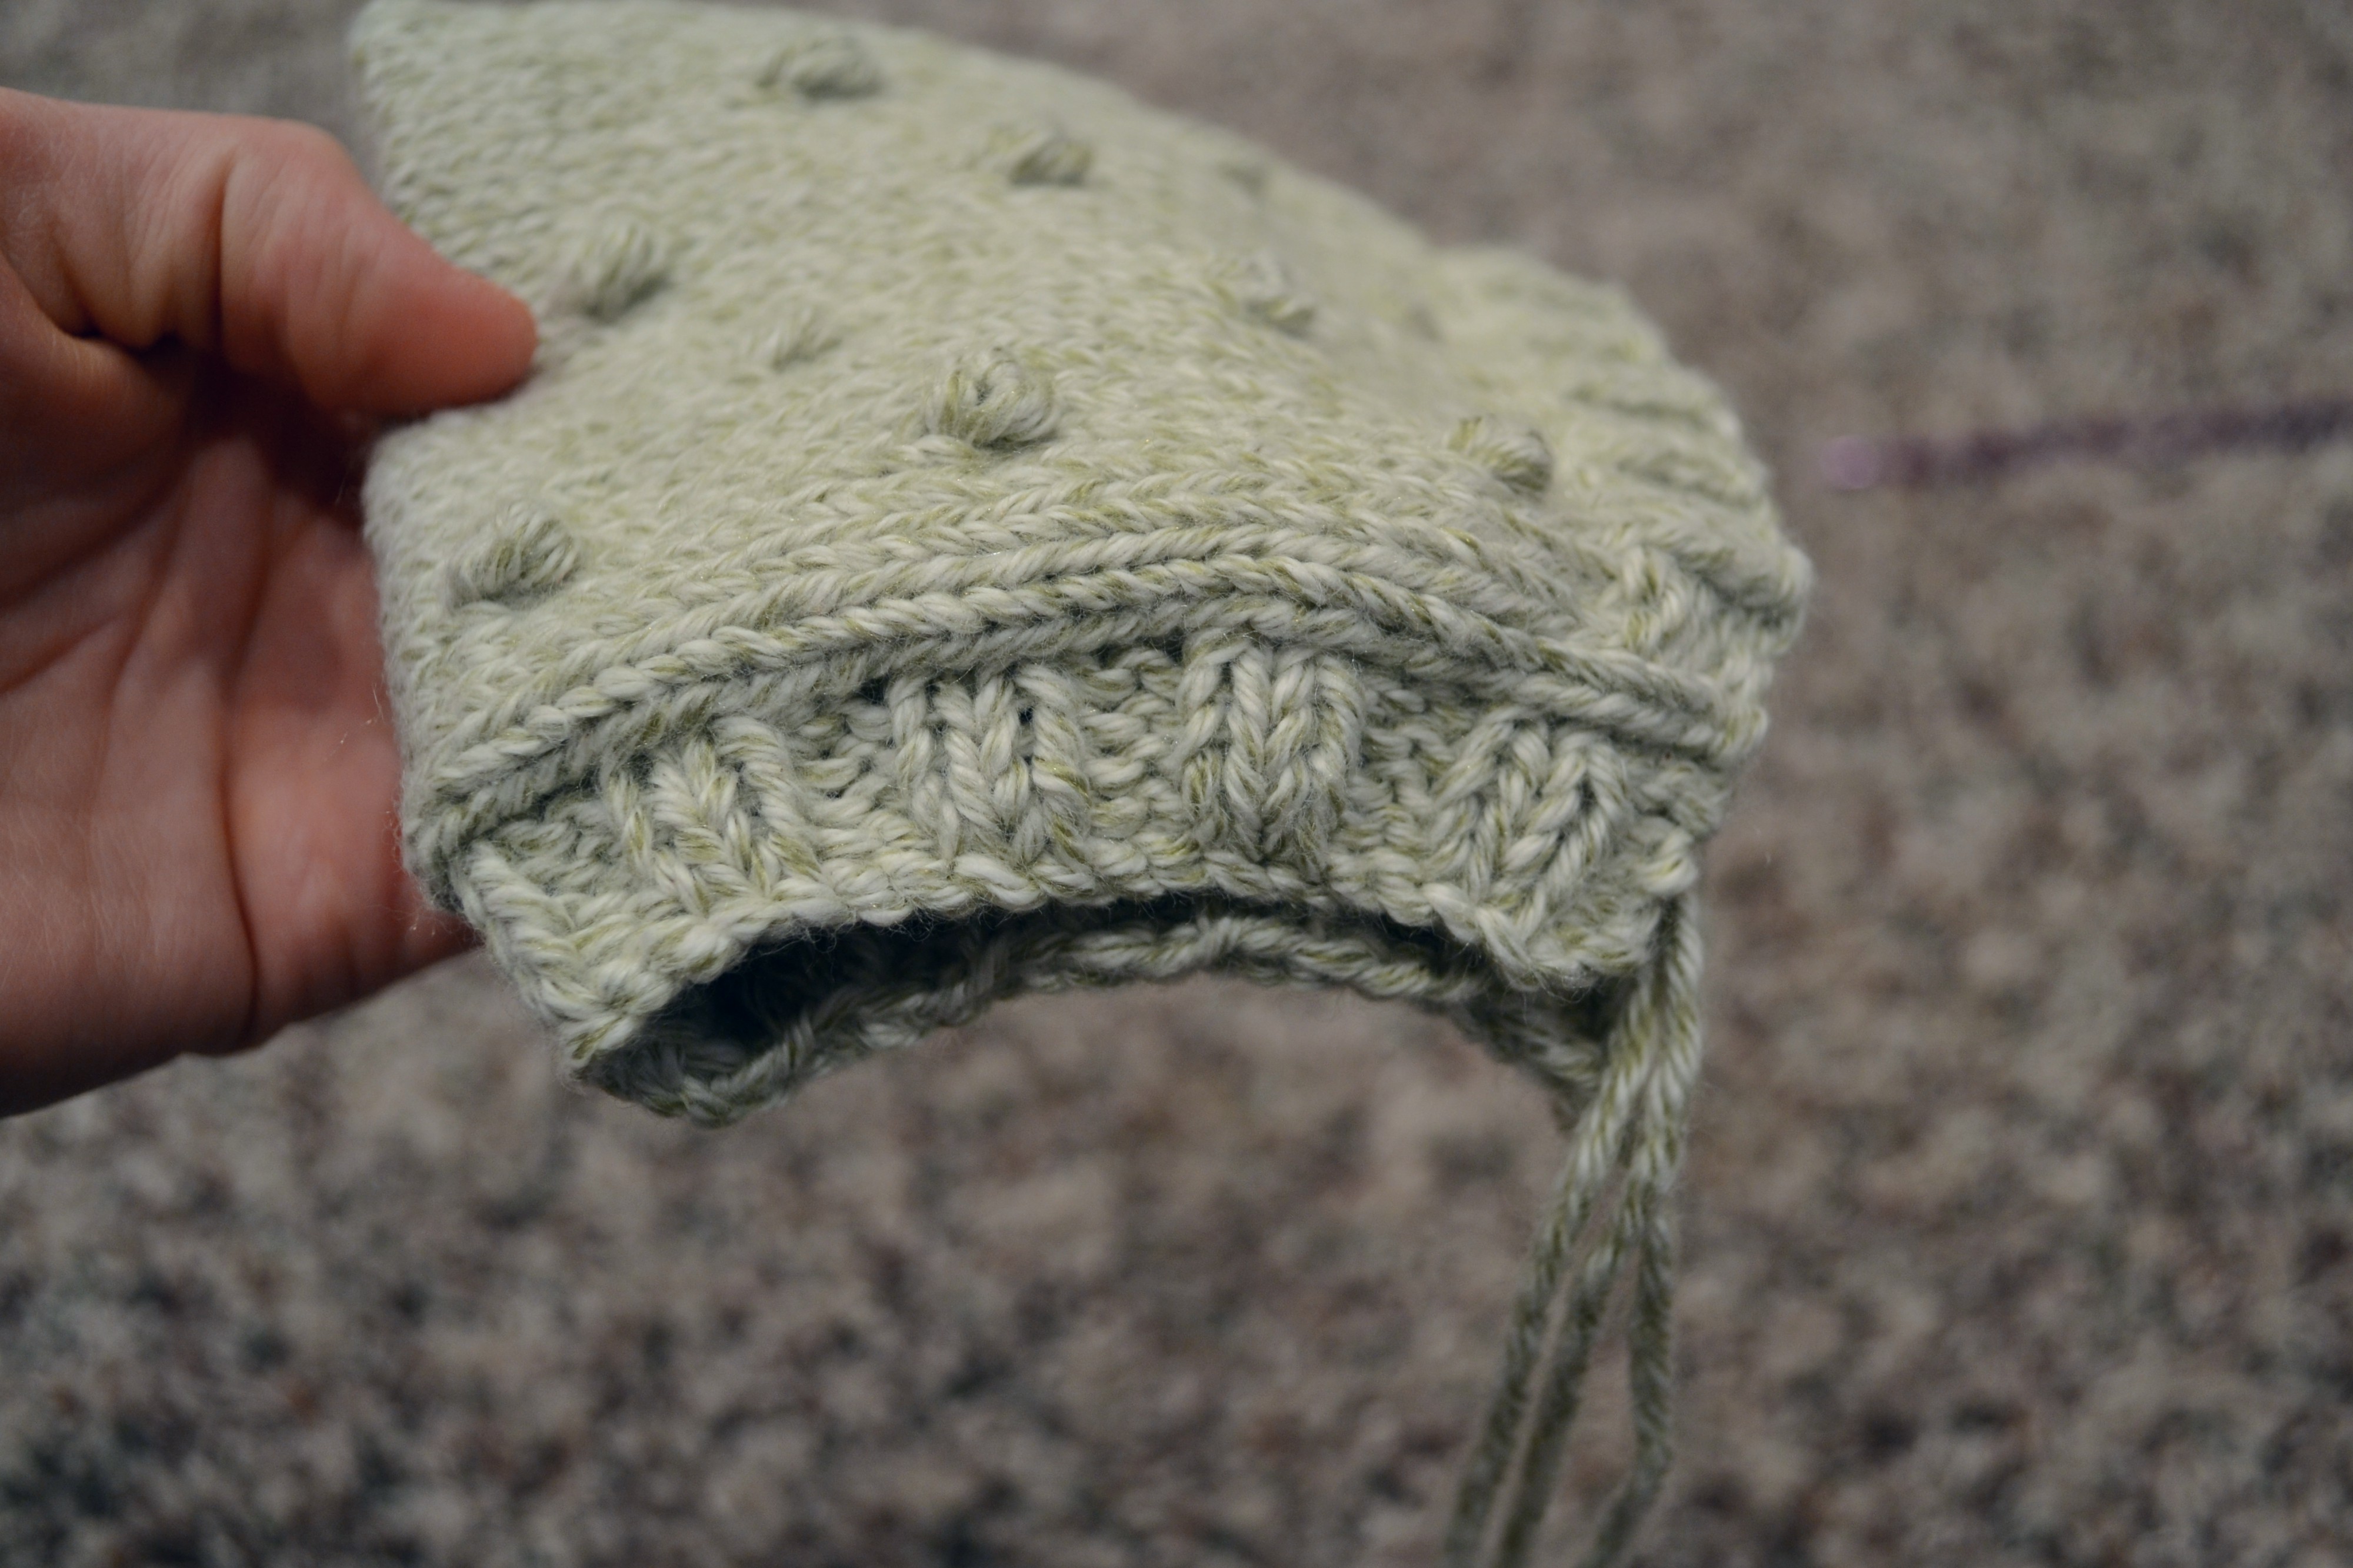 Seriously though is this not the easiest bonnet? Anyone who can knit and purl can do it. I’m sure of it.
Weave in your ends and cut six 35inch pieces of yarn. Pull three strings through each corner I usually go in and up about 3 stitches so it’s not right on the edge. I also use a crochet hook here, it’s so much easier.
Braid, knot, trim, make a pom pom for the top if you want and voila! You’re done.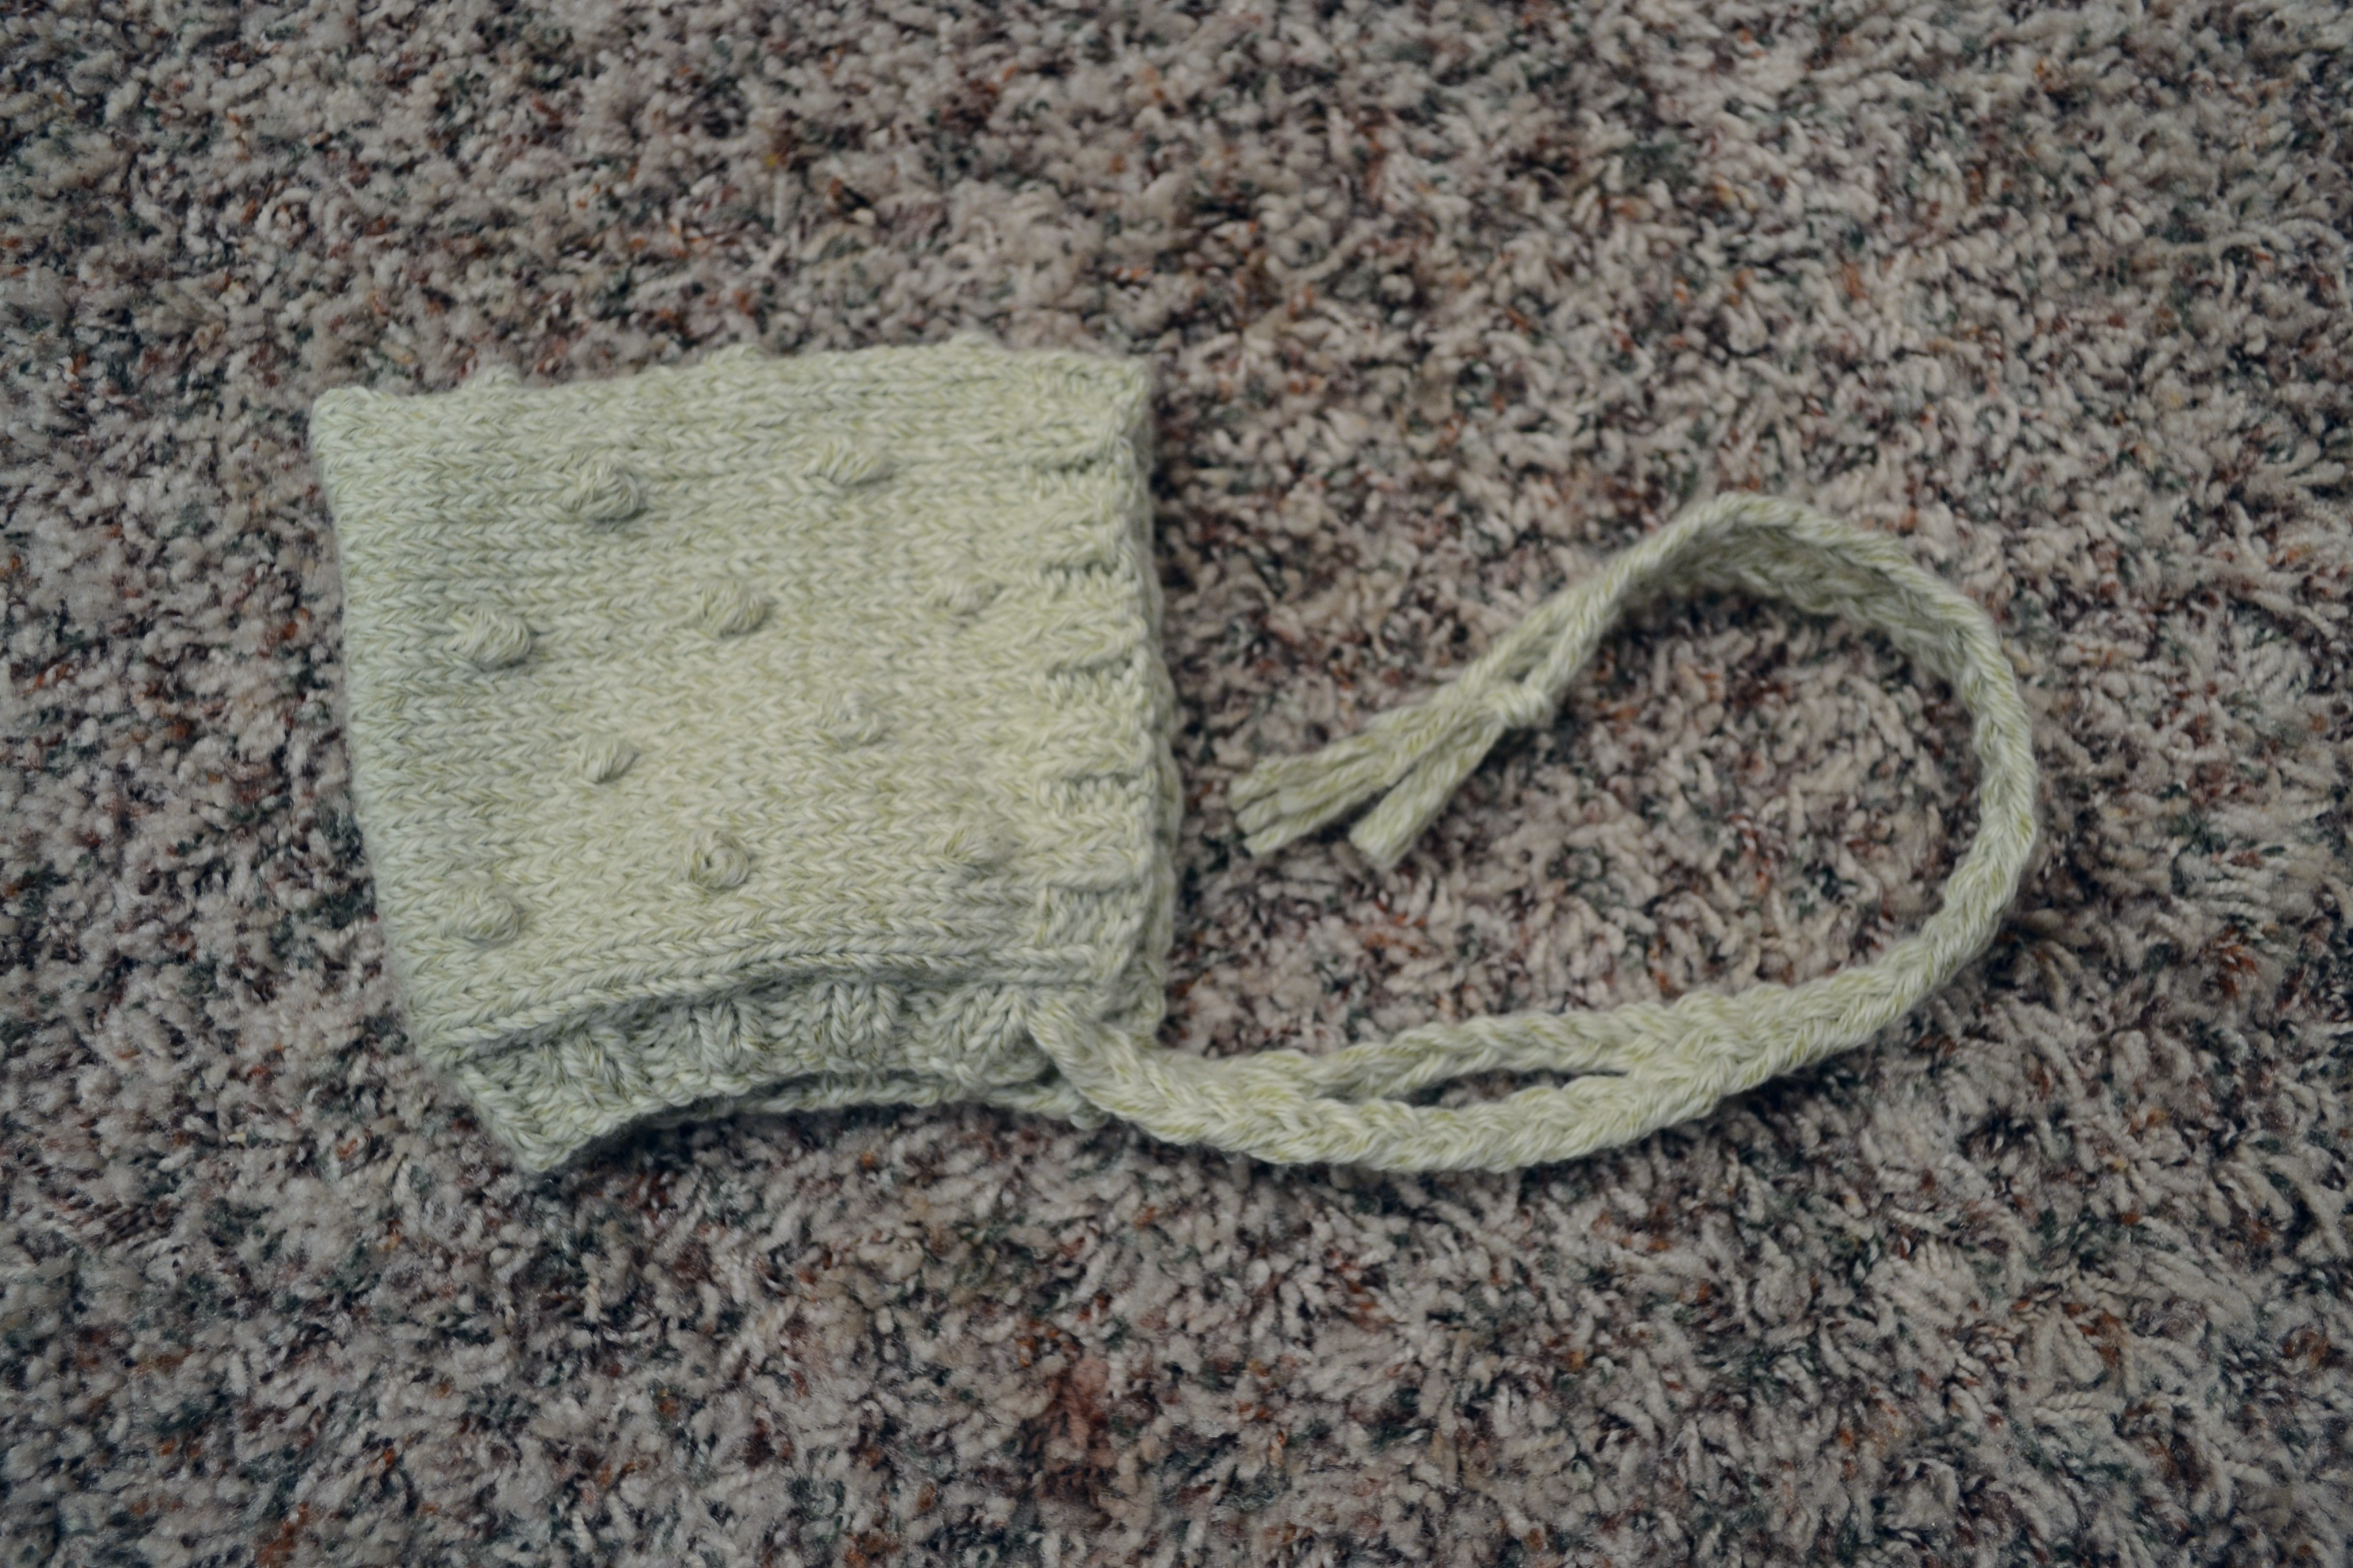 I love this bonnet.
I’ve so enjoyed the process of creating this pattern. It took me nine months to complete so it’s kind of feeling like a 4th child right now. I’m so happy it’s here.
I hope you love making this pattern too.

Thanks for knitting along with me.

Who is that baby? Oh my goodness that hat is adorable on her!
LikeLike
Isn’t she cute? She’s a friend’s baby and she’s kind of to die for.
LikeLike
You say the bonnet requires one skein of yarn – what size skein? 50 gm? 1 or 2?
LikeLike
Hi Judi, thanks for the question. The skeins I use are 100 gm but I can usually get two bonnets out of it with yarn to spare so I bet a 50 gm would be just fine.
LikeLike
I bought the patter on Etsy but, how many do I cast on for larger sizes?
LikeLike
Hi Sharon! The pattern you bought has each size listed separately. Right under the size listed, the pattern will tell you exactly how many to cast on. Thanks for the question!
LikeLike
Could you clarify the bobble pattern? Is it a 5 or 10 stitch repeat, how many rows between bobble rows, and how do you vary the stitch count on the bobble rows so the bobbles are staggered?
LikeLike
Hi! Yes, it’s a 10 stitch repeat but some of the bobbles are 5 stitches away from the edge to create the stagger if that makes sense? Then you will knit 5 new rows before you start your next bobble row. Let me know if I can help any more! The pattern goes stitch by stitch on those bobble rows I hope it’s clear but let me know if it’s still confusing! thanks so much 🙂
LikeLike
Could you explain the decrease 4 stitches for the bobble? I’ve tried to find video tutorials but they vary significantly. Is there a video tutorial you know of that explains the bobble stitch in your pattern?
LikeLike